La Gate of the Setting Sun is a 5-player dungeon located between the Vale of Eternal Blossoms and the Dread Wastes in Pandaria. The dungeon is only available to level 90 players. It hosts 4 encounters: Kip'tilak Saboteur, Striker Ga'dok, Commander Ri'mok, and Raigonn.

For generations, a great wall called the Dragon's Spine has protected the inhabitants of Pandaria from the periodic assaults of the wild insects known as mantid. The brutal cycle of aggression of this breed has begun earlier than expected and has caught the defenders of the wall off guard. As the fiercest mantid warriors charge into the ancient gates, Pandaria must repel the most devastating army in its known history.
Introduction
Type: Dungeon
Location: Dread Wastes
Player Limit: 5
Difficulty modes: Heroic, Challenge
Bosses:Kip'tilak Saboteur, Ga'dok Striker, Ri'mok Commander, Raigonn
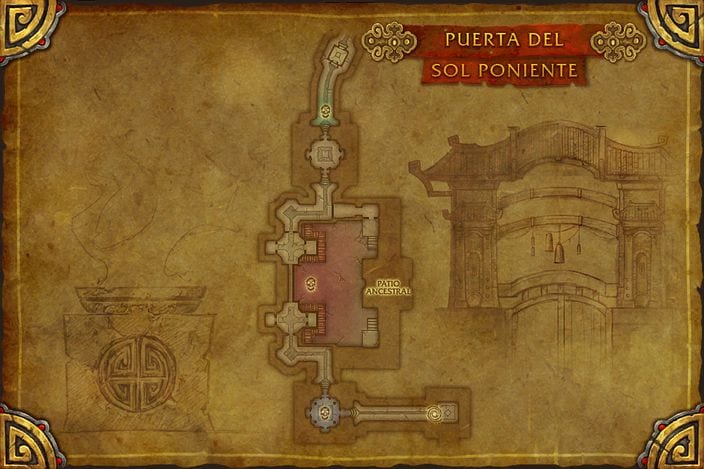
The Gate of the Setting Sun is the only passage between the Vale of Eternal Blossoms and the Dread Wastes. It is currently closed, in an attempt to contain the Mantid army and prevent it from invading the valley. Throughout the dungeon you will fight the Mantid assault, culminating in your breaking through the main door and entering the courtyard in front of it.
The dungeon has a linear development during which you will advance through the wall before descending to ground level to close the door. This dungeon is accessible only in Heroic mode at level 90.
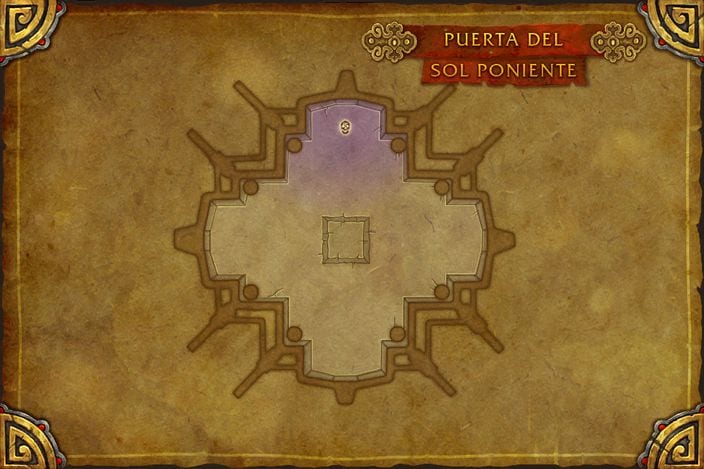
| Gate of the Setting Sun | Gate Watch Tower |
|---|---|
|
|
This guide will cover the four boss encounters, as well as the quests and achievements that are available in the dungeon.
Boss Skills
{tab = Kip'tilak Saboteur}
Location: Gate of the Setting Sun
History: Mantid are no strangers to the war machine and use technology to win their wars. Pandaren don't stand much of a chance against ammo experts like Kip'tilak, who plunges into enemy territory and threatens to destroy their already weakened strongholds.
- Throw explosives- Saboteur Kip'tilak chooses a random location in the room and drops a stable ammo bundle.
- Stable ammo- These explosive materials will not explode unless detonated by another explosion.
- Mantid Ammo Explosion - When explosions from other Stable Munitions or Sabotages come into contact with Stable Munitions, they explode in all four cardinal directions, dealing Fire damage to all players in their path.
- Stable ammo- These explosive materials will not explode unless detonated by another explosion.

Sabotage - Saboteur Kip'tilak places 4 explosives on the back of a random player. When Sabotage expires, the charges explode towards the four cardinal points, dealing Fire damage to all players in its path. Sabotage deals Fire damage to the victim when the explosion occurs.
-
World on fire - When Saboteur Kip'tilak's health reaches 70% and 30%, it detonates all currently active explosive charges.
Dating (3)
-
[Saboteur Kip'tilak] yells: Put a bomb in your life!
-
[Saboteur Kip'tilak] yells: The door? I'm going to tear down the whole wall!
-
[Saboteur Kip'tilak] yells: You are… the… bomb…
{tab = Striker Ga'dok}
Site: Gate watchtower
History: The besiegers are an aerial component of the great army of the mantid empire. Among them are veteran aces like Ga'dok, capable of unleashing a devastating rain of fire on hundreds of enemies. He and his minions seek to wreak destruction among the defenders of the gates.
-
Time to prey - Besieger Ga'dok charges at a nearby enemy and devours them, dealing Physical damage every second for 5 seconds.
-
Impaling Strike - Besieger Ga'dok impales his current target, dealing 50% of their total health as Physical damage.
-
Bombing - When Besieger Ga'dok's health reaches 70% and 30%, bombard the platform with incendiary bombs. The resulting flames deal Fire damage every second to enemies caught in them.
-
Krik'thik Disturber- These flying mantids constantly bombard the platform with acid bombs.
-
Acid pump - Disruptive Mantids periodically bombard a random player's location with an acid bomb, dealing Nature damage every second to players within 5 meters of the impact zone.
-
-
Krik'thik Besieger - Mantid Slayers attack players on the platform during Stalker Ga'dok's bombardments.
Dating (1)
-
[Striker Ga'dok] yells: I will drop your corpses from this tower.
{tab = Commander Ri'mok}
Site: Gate of the Setting Sun
History: Commander Ri'mok supervises the mantid ground troops that lay siege to the gates relentlessly. Ri'mok, unafraid of defenders, uses endless reinforcements to crush the deluded who stand in his way.
-
Viscous fluid - Commander Ri'mok emanates a viscous fluid with a radius of 6 meters at his location. Contact with the fluid increases the damage done by Ri'mok by 10% and reduces the damage done by players who remain in it by 10% every second. This effect stacks five times.
-
Frenzied assault Ri'mok unleashes a Frenzied Assault, dealing 50% of his normal melee damage to all targets in a 90-degree, 9-foot cone every 0,25 seconds for 6 seconds.
-
Swarmer Krik'thik - Waves of reinforcements continually scale the wall to aid Commander Ri'mok.
-
Krik'thik Saboteur- Krik'thik saboteurs periodically join the battle.
-
To bomb - Saboteur Krik'thik launches a volley of bombs around him, dealing Fire damage to all enemies within 40 yards.
-
Dating (1)
-
[Commander Ri'mok] yells: There's no running away from me.
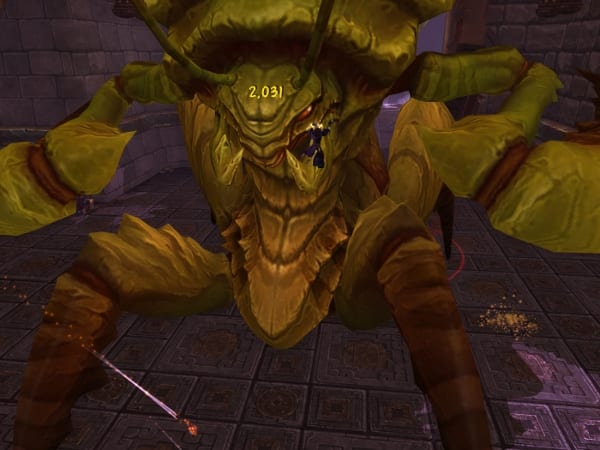
{tab = Raigonn}
Site: Ancestral Patio
History: This gigantic mantid leads the assault on the gates. As the living ram, Raigonn mercilessly attacks the pandaren defenses in an attempt to remove all obstacles that stand in the way of Pandaria's cruel invasion of the mantid.
Break the siege
Raigonn has gone through the outer door and wants to break down the inner door! It must be stopped by destroying its Vulnerability.
-
Indestructible shell - Raigonn's Indestructible Shell reduces the damage dealt to Raigonn by 99% until players destroy his Vulnerability.
-
Vulnerability - Raigonn exposes her Vulnerability, allowing players to climb onto her head and attack her! Destroying the Vulnerability also destroys Raigonn's Shell.
-
Ramming headbutt - Raigonn charges into the inner door, the impact of the headbutt inflicting physical damage to enemies within a 10 meter radius. The impact against the door also knocks down all enemies under the effects of Raigonn's Vulnerability.
-
Krik'thik Protectorate- Eight Krik'thik protectorates join the fight from the other side of the wall.
-
Hive mind - When a Krik'thik Protectorate has 20% health remaining, cast Hive Mind, increasing the attack speed of all nearby Krik'thik Protectorates by 50%.
-
-
Krik'thik Gravedigger- Three Krik'thik Burying Mantids fly while casting Burying Winds.
-
Burying winds Burying Winds creates a tornado at the targeted location, dealing Nature damage to enemies within 3 feet and additional Nature damage every second.
-
-
Swarm Liberator Krik'thik- A Krik'thik Swarm Liberator joins the fray and hurls raucous swarms at enemies.
-
Raucous swarm - Raucous Swarm absorbs healing and deals Shadow damage every second. The Swarm separates from its host after 10 seconds. The Swarm also deals damage every second to enemies within 20 yards.
-
Cracked shell
-
Broken shell - Broken Mantid Shell increases Raigonn's damage taken by 300%.
-
Setting –Raigonn fixes on a random player for 15 seconds and their movement speed is increased by 75%.
-
Stomp - Raigonn stomps his foot, dealing Physical damage to all nearby enemies. Each time he stomps, he gains an application of Frenzy, increasing damage dealt by 25%.
{/ Tabs}
Strategies of the Heroic Gate of the Setting Sun
{tab = Missions}
Missions
There are 2 missions that can be completed within the instance. He gives you both Bowmistress Li at the entrance to the dungeon.
The first mission is Lighting the way. It requires you to light the signal flame, which is located at the north end of the wall. You will be able to access it before meeting with Commander Ri'mok , the third boss of the dungeon.
The second mission is Now that's a big bug!. Requires you to kill Raigonn, the last boss of the dungeon.
Alone, that's a big bug! it has a reward. Has a level 440 item. (See loot section above).
{tab = The Pulls}
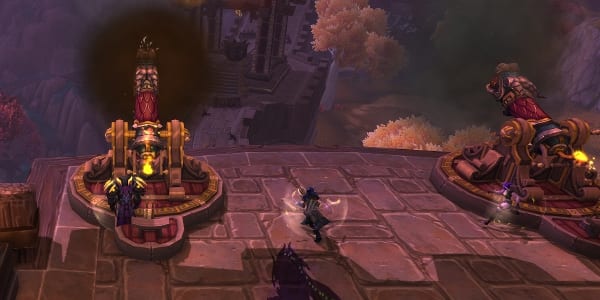
Pulls before Kip'tilak

On your way to Kip'tilak Saboteur, the first boss of the instance, you will have to eliminate several mobs. As long as the mobs don't have any aggro, you will have to watch out for the bombs that the other Mantid units, who are flying over the walls, will drop regularly. These bombs will explode and create four fire trails that will travel from the explosions. As you can see, they can become problematic when multiple bombs fall at the same time.
{tab = Kip'tilak}
Kip'tilak Saboteur
The fight with Kip'tilak Saboteur It is relatively easy, especially since the previous mobs have already helped you to prepare against the Mantid bombs, which all they do is increase the difficulty of the combat.
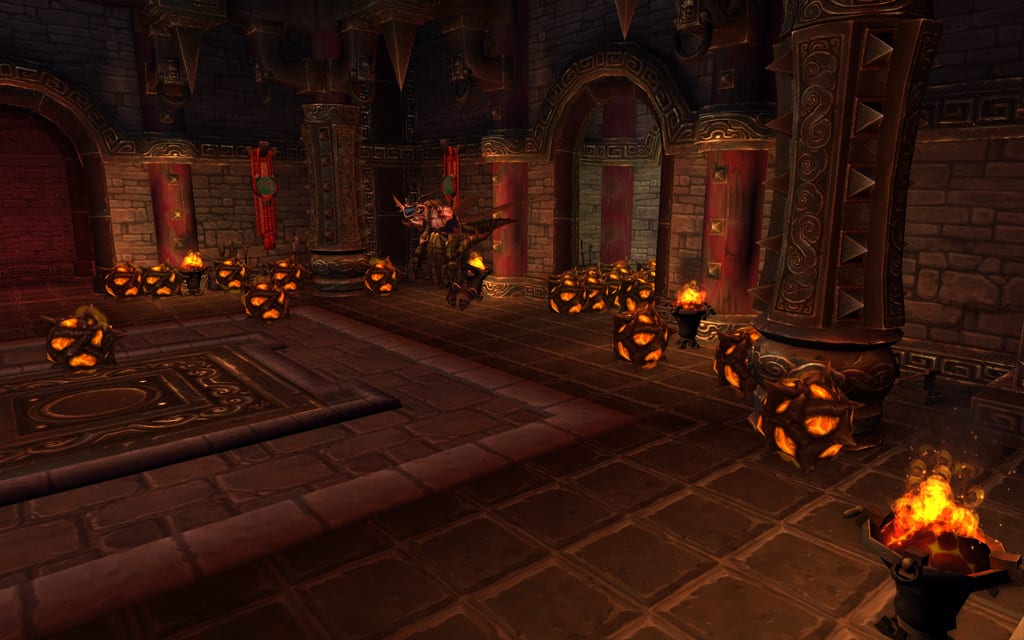
In addition to dealing melee damage to the tank, Kip'tilak will often drop explosives (Stable Ammo) at random points in the room.
When one of them explodes, trails of fire will run in the room towards each of the cardinal points (north, east, south, west). Similar fire trails will be created by ![]()
Sabotage, which the boss will often throw at a random player, causing the player to explode after a few seconds.

Stable Ammo is, as the name suggests, stable. It will only detonate if it is hit by a trail of fire, which, as explained above, can be the result of another set of Stable Ammunition explosions or a player receiving the blast ![]()
Additionally, when Kip'tilak reaches 70% and 30% health, it will detonate all Stable Ammunition currently in the room with World on fire.
In this boss's strategy, the key is positioning. Each member of the group has to position himself in such a way that there are no bombs to the north, east, west and south of him. In this way, they will never be hit by the trails of fire, and their explosions of ![]()
Sabotage no more bombs will be detonated.
5.1. Achievement: Human Bomb
Complete the logo of ![]()
Human bomb It is very simple. You need to leave Kip'tilak Saboteur at 72 or 73% health and stop DPS until he rolls 15 Stable Ammunition around the room. During this time, group members need to avoid detonating due to their ![]()
Sabotage. When you reach 15 Stable Ammunition, lower the boss below 70% and he will detonate all the bombs with World on fire.
{tab = Ga'dok}
6. Striker Ga'dok

Striker Ga'dok It is located in the Gate Watchtower, just below the gate's north pillar. Friendly NPCs will activate an elevator so you can get there.
Like many heroic dungeon encounters, encountering the Ga'dok Striker is not difficult, as long as you pay attention to what's going on.
The most important aspect of the peel is ![]()
Bombing, which will occur twice, when Ga'dok reaches 70% and 30% health.
When this happens, the boss engulfs half of the burning platform twice (first from west to east, then north to south).
As you can see in the image to the left, the flames separate the platform in two, and it is important that you stay with the rest of your group. This will allow you to take precautions with Krik'thik besiegers who will attack the group during the bombardment.

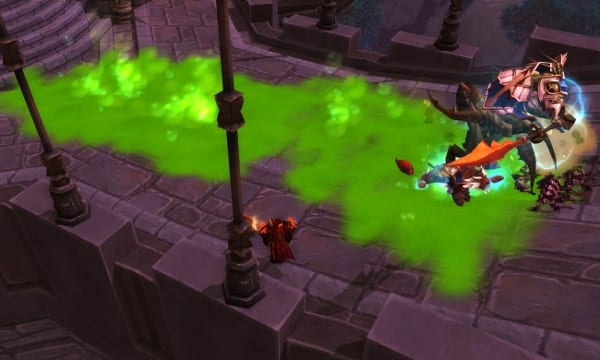
In addition to this, you need to be careful with ![]()
Acid Pumps, which will regularly launch the Krik'thik Preturbers. These bombs create pools of poison on the surface of the platform.
Finally, healers should pay attention to ![]()

Impaling Strike deals physical damage to the tank equal to 50% of its life, so it needs to be as healed as possible.
-
Time to prey It is a DoT that the boss will regularly apply to group members.
{tab = Ri'mok}
Commander Ri'mok
After defeating Ga'dok, you have to use the cannons in the Gate Watchtower to secure the northern end of the walls where you can light the flame signal to Lighting the way. Then, you will have to kill a few add to be able to fight with it Commander Ri'mok.
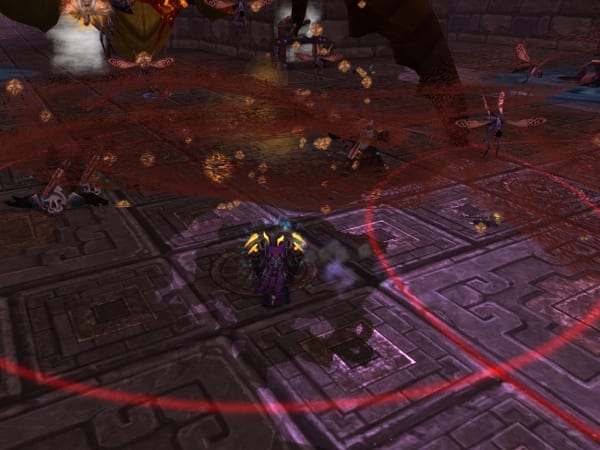
During the fight, Ri'mok has to be continuously moved down the ramp to prevent standing in the poison chambers you create with ![]()
Viscous fluid. In effect, being on top of them causes them to pile up and increases the damage it causes and reduces the damage it receives. Stacks up to five times.
Apart from that, it is necessary avoid being in front of him because he has another attack called ![]()

Finally, Swarmer Krik'thik y Krik'thik Saboteurs they will join the fight regularly and will have to be eliminated.
Healers need to keep in mind ![]()
To bomb, which saboteurs will regularly launch. This ability deals damage to all players.
{tab = Conscriptinator Achievement}
Achievement: Conscriptinator
Once you Commander Ri'mok is defeated, three Krik'thik recruits will appear on the wall near the entrance, allowing you to complete ![]()
conscriptinator. When they die, they leave behind a pool of poison that gives you a debuff called ![]()
Resin residue when you step on it. You need to stack this debuff three times, going through the puddle left by each of the three Krik'thik Recruits.
Notice that ![]()
Resin residue It lasts 1 minute, so you must kill the second Conscript within a minute of killing the first and third within a minute of the second.
In addition, ![]()
Resin residue increases the damage it causes ![]()
Resin Burst, one of the skills that Recruits cast. Healers need to take into account the extra damage taken as the fight with the recruits continues.
{tab = Raigonn}
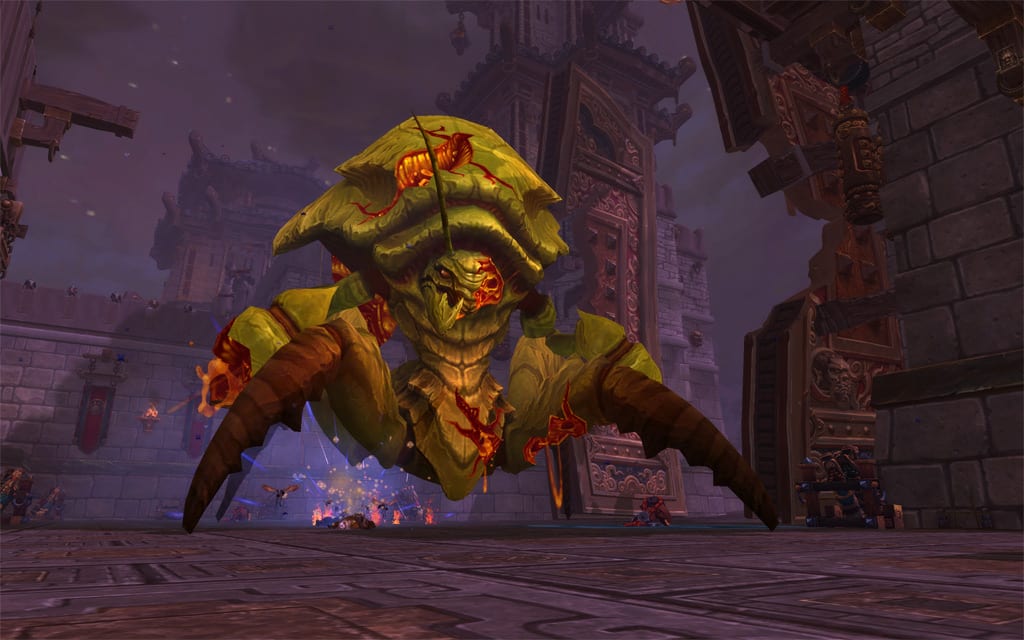
Raigonn
After defeating the Commander Ri'mok, the Mantids will break open the Gate of the Setting Sun, giving a chance to Raigonn, the giant Kuchong, entering the courtyard. Here, he will nail down the last remaining stronghold between the Vale of Eternal Blossoms and the Mantid forces.
This final boss has two phases. During the first phase, you will have to break Raigonn's shell, at the same time that you face a number of enemies. During the second phase, Raigonn will lock onto a random party member and you will need to stop DPS.
Raigonn doesn't need to be tanked, but some of the enemies do.
First phase
During the first phase, you must prioritize enemies over Raigonn.
Here is a list of the different enemy types you have to deal with.
-

Swarm Liberator Krik'thik fixes on a group member randomly
Raucous swarm, deals shadow damage every second to target player, as well as players within 20 yards. Killing the liberators should be the Maximum priority during this fight.
-

Krik'thik Protectorate They arrive in waves of 8. They must be tanked and taken down with area damage. When they reach 20% life, they cast
Hive Mind, increasing the attack speed of nearby protectorates. The tank and healer must be prepared for when this happens. Dps must damage all protectorates at the same time until they reach the 20%, before killing them one by one.
-

Krik'thik Gravedigger fly overhead and create tornadoes called
Burying winds on the floor. These tornadoes cause proximity damage within 3 meters and they should be avoided.

Raigonn should take the damage when not busy with the additional enemies.

He will keep hitting the wall to the Vale of Eternal Blossoms using ![]()
Luncheon head. It cannot be directly damaged, so you will need to break its shell by attacking its Weak point To get to the weak point, you need to use one of the launchers (as in the image on the left). Every time Raigonn uses ![]()
Luncheon head, will launch all enemies that attack its weak point on the ground, and will damage everyone within 10 meters of impact. So, remember to jump when I go hit.
Second stage
After his shell is broken, Raigonn enters the second phase. Increase its damage, by its ![]()
Broken shell, and keep using ![]()
Setting on a random player. It does not need to be tanked. Pinned players should take him away from other players because he regularly throws ![]()
Additional enemies stop coming out, but you may have some from the first phase. You should delete them first.
{tab = Mantid Swarm Achievement}
Achievement: Mantid Swarm
To complete the achievement ![]()
Mantid swarm, you need to defeat Raigonn without killing any additional enemies. The idea is to use all your cooldowns during the first phase to force Raigonn to enter the second phase with as few enemies as possible.
There is a great deal of chance in this achievement, as some of the waves are much more difficult to deal with than others.
{/ Tabs}
Heroic Setting Sun Gate Rewards
The level of the objects that you can obtain from the Puerta del Sol Setting is 463, with one exception, ![]()
Klatith, Fangs of the Swarm, which is a level epic item 476.
{tab = Armors}
Armor
| Name Object | Armor | Box | Main Statistics | Source |
|---|---|---|---|---|
| Fabric | Helmet | Intellect / Spirit | Kip'tilak Saboteur | |
| Fabric | Shoulder pads | Intellect | Raigonn | |
| Fabric | Bracers | Intellect / Spirit | Raigonn | |
| Fabric | Gloves | Intellect | Striker Ga'dok | |
| Fabric | Trousers | Intellect | Commander Ri'mok | |
| Leather | Bracers | Agility | Kip'tilak Saboteur | |
| Leather | Trousers | Agility | Raigonn | |
| Leather | Boots | Intellect | Striker Ga'dok | |
| Mesh | Helmet | Agility | Commander Ri'mok | |
| Mesh | Belt | Agility | Striker Ga'dok | |
| Mesh | Boots | Agility | Raigonn | |
| Plates | Front | Intellect | Raigonn | |
| License plate | Shoulder pads | Force | Striker Ga'dok | |
| Plates | Bracers | Force / Dodge | Commander Ri'mok | |
| Plates | Gloves | Strength / Mastery | Raigonn | |
| License plate | Belt | Force | Kip'tilak Saboteur |
{tab = Weapons}
Weapons
| Name Object | Type | Main Statistics | Source |
|---|---|---|---|
| Mace | Intellect | Raigonn | |
| Shield | Intellect | Raigonn | |
| Dagger one hand | Agility | Commander Ri'mok | |
| bow | Agility | Raigonn | |
| Shield | Force / Stop | Raigonn |
{tab = Amulets, Cloaks, Rings, and Trinkets}
Amulets, Cloaks, Rings, and Beads
| Name Object | Type | Main Statistics | Source |
|---|---|---|---|
| Amulet | Intellect / Hit Rating | Kip'tilak Saboteur | |
| Cover | Intellect / Spirit | Now that's a big bug! | |
| Cover | Intellect / Hit Rating | Now that's a big bug! | |
| Ring | Intellect / Spirit | Commander Ri'mok | |
| Trinket | Intellect / Critical | Striker Ga'dok | |
| Cover | Agility | Now that's a big bug! | |
| Ring | Agility | Kip'tilak Saboteur | |
| Cover | Force | Raigonn | |
| Cover | Strength / Mastery | Now that's a big bug! | |
| Cover | Strength / Parry | Now that's a big bug! |
{/ Tabs}
Heroic Gate of the Setting Sun Achievements
| Human bomb
Unleash 15 explosions in 15 seconds during Saboteur Kip'tilak's encounter at the Gate of the Setting Sun on Heroic Difficulty.
|
10 | |||
| conscriptinator
Obtain 3 stacks of Resin Residue by defeating Mantid Conscripts in the Gate of the Setting Sun on Heroic Difficulty.
|
10 | |||
| Contender of the Gate of the Setting Sun
Complete the Gate of the Setting Sun challenge mode.
|
10 | |||
| Mantid swarm
Defeat Raigonn without killing any of the Mantid reinforcements.
|
10 | |||
| Heroic: Brotherhood at the Gate of the Setting Sun
Defeat Raigonn in the Gate of the Setting Sun on Heroic Difficulty in a guild group.
|
10 | |||
| Heroic: Gate of the Setting Sun
Defeat Raigonn in the Gate of the Setting Sun on Heroic Difficulty.
|
10 | |||
| Gate of the Setting Sun: bronze
Complete the Gate of the Setting Sun challenge mode with a Bronze Commendation or higher.
|
10 | |||
| Gate of the Setting Sun: gold
Complete the Gate of the Setting Sun Challenge Mode with a Gold Commendation.
|
10 | Path of the Setting Sun | ||
| Gate of the Setting Sun: silver
Complete the Gate of the Setting Sun Challenge Mode with a Silver Commendation or higher.
|
10 | |||
Videos of some strategy of the Puerta del Sol Poniente Heroica
{tab = MMOchampion}
{tab = Method} {/ Tabs}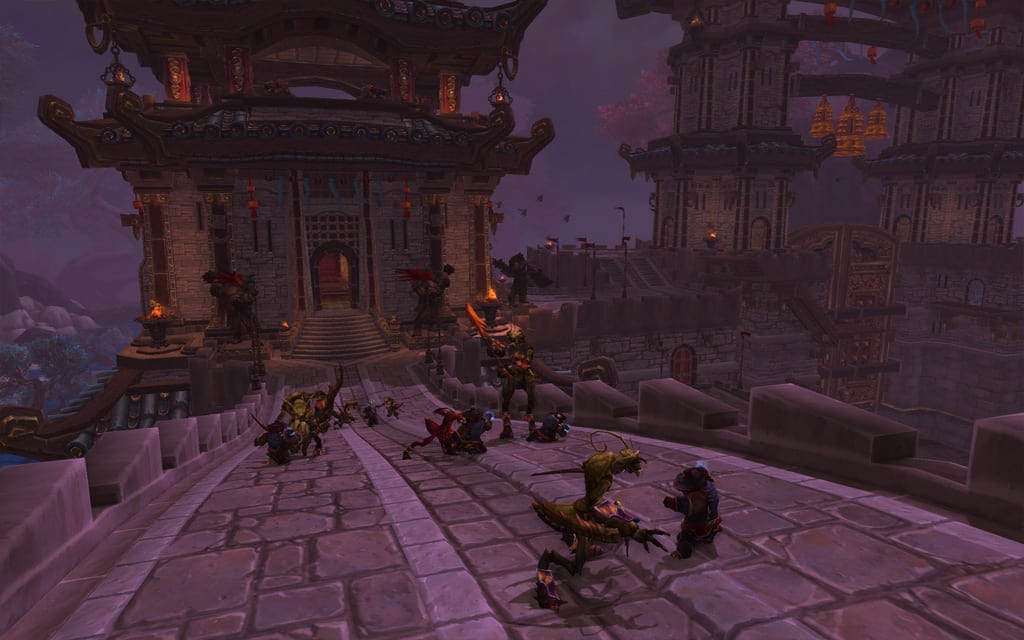


In my opinion, with how easy these heroics are, it is not necessary to read the guides xD it will have to do with the challenge difficulty ^^
I think the same xD