The Tol'vir are an ancient race hidden in a hidden city in the deserts of Uldum. Their existence has long been unnoticed by the rest of the races, but Deathwing's return to Azeroth has caused them and Al'akir to forge a cooperative alliance as the Tol'vir are the only race unaffected. by the curse of the flesh.

The Lost City of the Tol'vir is one of the simplest in Cataclysm and is designed for level players 84-85. It has a total of 4 encounters and it is recommended (although not necessary) to have classes that can control Humanoids.
Entrance to The Lost City of the Tol'vir
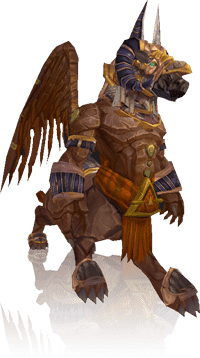
General Husham

"Salud": 2,074,850 / 4,564,670
- Level: 84 / 87
- Skills:

Bad intentions: Husam prepares and charges at an enemy player, dealing massive damage to him.
-
Shock wave: General Husam fractures the ground at his feet causing a shock wave that deals 24,375 to 25,625 points of physical damage to enemies in front of him.
-
Hammer fist: An attack that deals 75% weapon damage instantly.
-
Mystical trap: Place Mystic Traps under players.
-
Mystical trap: Deals 25,000 / 50,000 points of fire damage to all players on the edges of the trap.
-
Detonate traps: Detonate all traps
It is the first boss that we will face and it is quite simple to execute.
Husam will continuously launch Mystical traps to the ground that will deal damage to players who pass through them and throwing nearby players. We will have to avoid them and, if necessary, move Husam away from them.
The general has a skill of Shock wave somewhat peculiar. When you start to use it, we will see 4 lines on the ground and a warning on the screen. We will have to move away from these lines (tank included) to avoid the large amount of damage it will do when launching the attack.
His most dangerous attack is called Bad intentions And it's a lot like Ice Howl. He will pick a random player, launch him into the air, and knock him against a pillar dealing massive damage.
It is an encounter with a lot of mobility to avoid both Shock Wave and Traps.
Once finished, we will have to decide between going for the High Prophet Barim or for Cierramauce & Augh.
Differences in heroic mode
In Heroic mode, the mines will begin to glow after a period of time. The animation is a bit bigger than the bomb and if there is a player in it, it will do a lot of damage to the bomb. Detonate the traps.
High Prophet Barim / High Prophet Barim

"Salud": 1,659,880 to 3,734,730
- Level: 84 / 87
- Skills:
- Phase 1: Physics
-
Fifty lashes: The next 10 attacks of the Prophet will deal 5,000 more points of damage.
-
Plague of the times: Fires a bolt of cursed blight at a player, dealing 6800 to 9200 Nature damage, and leaps to other nearby enemies when dispelled or at the end of their time
-
Fury of heaven: Creates a whirlwind-force vortex near a player that deals about 15,000 / 19,000 points of damage to players within 12 meters of it
-
Repentance: Barim will draw all players towards him and rip the soul from the bodies. This occurs at 50% of the Prophet's health.
- Phase 2: Spiritual
-
Repentance: The prophet is immune to damage during this phase.
-
Holy ground: Inflicts 7,400 and 8,600 / 9,620 and 11,180 Holy damage to those who step on holy ground.
- At the beginning of this phase, Barim invokes a Harbinger of Darkness with 829,940 - 1,244,910 health points.
Skills-
Sect soul: A fragment of your soul will be sectioned that will bring a small spirit.
-
Lament of darkness: Inflicts between 4,625 and 5,375 / 7,000 Shadow damage to a random player.
-
Lament of darkness: When the Harbinger of Darkness dies, cast this last spell that inflicts between 20,396 and 23,703 / 26,513 and 30,812 points of Shadow damage to all players and expels them from the spirit world.
This boss has two main phases.
From time to time, the prophet will invoke the Fury of heaven that it is nothing more than a solar ray that we will have to avoid if we do not want to suffer significant damage every second.
At 50% the High Prophet will use Repentance stunning the entire group and extracting the soul from their bodies. Under Barim we will see a white area that is nothing other than Holy ground, which we must avoid at all costs.
In this phase, our main objective will be the Dark Phoenix that appears. Will often use Sect soul which will make appear small shadow monsters that we must eliminate before they reach the phoenix since, doing so, will gain a benefit that considerably increases all the damage that the group receives.
Once we manage to kill the phoenix, we will return to the first phase to kill the High Prophet.
Differences in heroic mode
During the first one, it will also appear a Fire Phoenix that creates a wall of fire through which it passes. It goes without saying that there is no need to step on fire. The phoenix should be set aside by a DPS or eliminated in case it causes trouble. When the phoenix dies, an egg will appear with which we can do nothing and the phoenix will reappear a few seconds later. If you decide to take care of the Phoenix, make sure you watch for his death to quickly change the Prophet and continue to harm him.
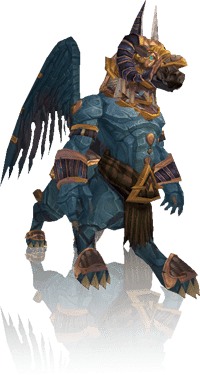
Jawbreaker & Augh / Lockmaw & Aug

"Salud": 1,659,880 to 3,734,730
- Level: 84 / 87
- Cierramauce abilities:
-
Dusty flail: Periodically smashes the ground with his tail.
-
Scent of blood: Jawbreaker slashes you between 1,387 and 1,612 / 1,850 and 2,150 points of bleed damage every 2 seconds. Nearby hungry crocolisks smell your blood! You are a prime target for the attack.
-
Poisonous anger: Increases damage dealt by 25% for until canceled.
-
Slimy poison: Inflicts between 10,740 and 13,260 / 20,585 and 25,415 points of Nature damage to an enemy target and their allies within 5 yards, slows their movement speed by 30%, and deals 8,325 to 9,675 / 13,875 and 16,125 Nature damage points every 2 seconds.
- Augh's abilities:
-
Dragon breath: Targets in a cone in front of Augh take between 18,037 and 20,962 points of Fire damage and are disoriented for 3 seconds.
-
Frenzy: Attack speed increased by 60%. Damage increased by 60%.
-
Stun dart: Fires a stun dart at the enemy, dealing 10,221 to 11,878 points of damage and then 4,300 points of damage every 2 seconds. Also reduces Haste by 40%.
-
Whirlwind: Deals 14,137 to 15,862 points of damage every second to surrounding enemies but reduces movement speed by 35%.

This combat is a bit chaotic at first and there is a lot of damage that can be avoided. Although there are two bosses in the encounter, all initial damage must be focused on Jawbreaker until he dies.
First we will face Cierramauce, a crocolisk. Its tail attacks are quite devastating so you have to stay away from it at all times and also, the animation is quite obvious so we will not have too many problems when avoiding it.
In a few seconds, it will appear ouch and we'll see how things start to get pretty tough. Whirlwind, which leaves cumulative damage over time to anyone it hits and must be avoided at all costs.
Healers must be vigilant to remove the effects it leaves Stun dart Not only because of the damage it leaves behind on impact, but also because of the haste reduction effect it has.
Scent of blood It is an ability that they will use on a member of the group in a random way, which will make a group of small crocolisks appear that will go straight for this objective. The player should quickly head towards the tank so that they can quickly grab them. These will easily die with area attacks.
At 30% Cierramauce will enrage. If we do not have a Rogue, Hunter or Druid To remove this effect, the tank has to activate special defensive abilities and kill it quickly.
A strategy, thanks to @qetesh, is to carefully enter the room behind, placing him with his tail towards the door. The DPS stay on the side and, in this way, when the little ones enter, they can make area attacks on the door, just touching the marked player. In this way, in addition, we get rid of the Whirlwind from Augh who will barely make it up the stairs.
Differences in heroic mode
Upon dying ouch He will return with full health and we will have to eliminate him to finish the fight. If we follow the strategy of @quetsh Above indicated, we will have time to rest a bit since Augh will not start the fight, making it much easier.
siamat

"Salud": 2,074,850 to 2,489,820
- Level: 84 / 87
- Skills:
-
Absorb storm: Gathering energy from the storm.
-
Diversion winds: Spell deflection increased by 90%. Damage taken 90%.
-
Stormy discharge: Inflicts between 9,425 and 10,575 Nature damage to an enemy.
-
Wailing windsHit enemies sending them flying, dealing 2,775 to 3,225 points of damage per second and slowing their speed.

Siamat is the last boss in this dungeon and the most difficult. When starting combat, he will use Diversion winds, which reduces all damage he takes by 90%. It will summon elementals that must be eliminated until the phase ends. He will also use Stormy discharge, which will rotate around the platform moving slowly. Like Altairus in the Vortex Pinnacle, we will have to avoid being hit by the clouds to avoid extra damage.
Siamat's Servants will use Lightning Bolt that will deal heavy damage to nearby enemies as well as Lightning collision that after a short period of channeling, it will deal about 25,000 points of damage to a player. It is advisable to interrupt this ability as much as possible although it is an easily healable damage.
The Minions of Siamat will use Chains of Lightning so we will remain at all times separated. These end up disappearing although they are equally dangerous. However, in case we have trouble eliminating them, we should focus on the Servants.
Once we have eliminated enough enemies, Siamat will withdraw the Winds and we can attack him. Although the Minions will continue to appear, we will have to ignore them but we will continue to spread out to avoid damage. Siamat will start Absorb storm increasing its damage more and more, reaching a point where it becomes incurable for the healer.
[notice] In this dungeon there are achievements that can help you get a Volcanic Stone Drake. If you need a little help to make the achievements, do not hesitate to visit our Cataclysm Hero Guide. [/ notice]