Mines of Death is one of the first dungeons that every World of Warcraft player has ever done, especially those of the Alliance. In Cataclysm, this dungeon comes with a heroic version. You will hardly recognize anything about the dungeon.

This heroic dungeon has 6 encounters, some of them very difficult. The final boss is none other than Vanessa Van Cleef, daughter of the late leader of the defias. It is one of the most difficult Heroics of Cataclysm if you have little equipment and you need some crowd control for humanoids if we want to be successful.
glubtok

"Salud": 2,489,820
- Level: 87
- Skills:

Arcane PowerGlubtok is filled with Arcane Power and casts Fire and Frost spells throughout the room.
-
Growing fire: A fiery blast deals Fire damage in an area and knocks enemies a short distance.
-
Flame cuffs: Glubtok ignites his fists with Fire, causing melee hits to deal bonus Fire damage and sometimes knock down nearby enemies.
-
Fists of Frost- Glubtok covers his fists in Frost, causing melee hits to deal bonus Frost damage and sometimes slow enemies.
-
Frost Flower: An icy flower that deals Frost damage to an area and slows the enemy's attacks and movement speed.

Glubtok is a fairly straightforward (albeit chaotic) combat with two phases.
During the first phase, you will be resetting the threat table every 5-10 seconds and hitting players with Fists of Frost y Fists of Frost. Both abilities allow him to deal bonus fire and frost damage to his target. We will know that he has reset the threat because he will use Blink and go for a new player. At this point, the tank needs to taunt him to make sure he doesn't do any damage to players.
At 40% the second phase begins. It will be placed in the center of the room, floating while casting Arcane Power. We will see how a wall of lava appears that will move clockwise, similar to Halion's ability. The group must be in constant motion to avoid being hit by fire while it hurts to Glubtok. Apart from fire, he will use Fire and Frost skills on the ground, from which we will have to move away.
In addition to this, elementals will appear. We will have to balance the damage between Glubtok and the elementals since they will appear faster and faster. It is best to use Heroism / Bloodlust and lower its health to the maximum while the tank takes over the elementals to finish off the Ogre as soon as possible.
Helix Gearbreaker / Helix Gearbreaker
-
"Salud": ???
- Level: 87
- Skills:
-
Breast pump: You have a bomb strapped to your chest! When the timer expires, an explosion will deal heavy Fire damage to all nearby allies and knock the target into the air.
-
Exploit: The bomb explodes, dealing 4,6250 to 5,3750 points of Fire damage to nearby enemies, knocking them back at a close range.

Helix is on the shoulders of a useless jerk that we will also have to defeat. It's a pretty straightforward match.
During combat, Helix will be throwing bombs on the ground that we will have to avoid stepping on. Helix will sometimes jump towards a player to place a Breast pump. The player must run away from the group so as not to harm nearby players. It is especially dangerous if the tank is affected.
Sometimes the Muttley will grab to a player and it will throw him towards a wall doing some damage to him although it is not at all worrisome.
Once the Muttley dies, Helix will attack us. Sometimes he will jump on someone to leave a bomb
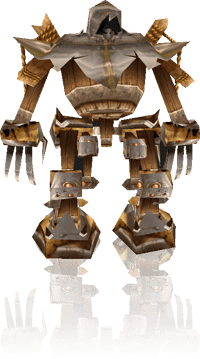
Foe Reaper 5000 / Foe Reaper 5000

"Salud": 4,100,000
- Level: 87
- Skills:
-
Harvest: The Enemy Siege is increasing the power of its harvest servo and moves towards the harvest target, dealing heavy damage to everything in its path.
-
Harvest Sweep: Enemy Siege attempts to harvest its target with one hit, dealing Physical damage to all nearby enemies.
-
Ultra speed: The Siegaenemigos activates its superspeed engines. Deal physical damage to all nearby enemies.
-
Reaper Strike: Deal physical damage in a cone in front of Enemy Siege.
-
Disabled security restrictions: Removed security restrictions. Physical damage dealt is increased by 100%.
In this match, things start to get more difficult.
One of the DPS must be done with one of the Experimental Mowers out there. This must stay down completely, killing the fire elementals that will appear. The mower has three abilities. The first deals melee damage and generates energy that we will need for the other two abilities. The second ability is a 3 second stun and the third, knocks enemies back. It is imperative that the elementals You are never Reach out to the group.
The rest of the group, meanwhile, must climb with the boss to the top of the ramp. His Harvest Sweep It is a frontal split attack so DPS must stay clear of the tank to avoid taking more damage. Will often use Ultra speed, which will spin it out of control, dealing quite a bit of melee damage to players it hits.
His most dangerous ability is without a doubt Harvest. He will select a random player (not the one who is mounted) and charge him. All players must move away from the original location of the marked player as any player caught along the way will do enough damage to kill them.
Once the boss reaches 40% health, he will have the Disabled security restrictions, dealing 100% more damage and causing Fire Elementals to spawn more quickly.
Admiral Rip Snarl / Admiral Ripsnarl

"Salud": ???
- Level: 87
- Time to rage: 5 minutes
- Skills:
-
To the jugular: Jump to a target, dealing 100% weapon damage and knocking it back.
-
Flagellum: A ferocious scourge that deals physical damage to the target and up to 3 nearby enemies.
-
Thirst for blood: Admiral Rip Snarl's bloodlust increases with each successive attack.

Admiral Rip Snarl stands atop the ship, where the final boss used to be. It is a fight that can get complicated if it is not done correctly. As a tip, the healer should only heal when necessary, otherwise they will run out of mana.
We can give you up to 75% without fear. At this point it will vanish and Vapors will begin to appear that we will have to kill while we can. Eventually, Snarl Ripper will return and Vapors will continue to appear and will not stop appearing. One of the DPS must be continually killing vapors because if it is not done, they will start to grow and there will come a point where they explode and kill the entire group.
The other two DPS must ensure that Rip Snarl is dealt enough damage not to reach 5 minutes of combat, nor stop growing too much damage. Thirst for blood, which is nothing more than an increase in attack speed.
At 25% health, the hard part begins. He will summon 5 vapors at once and it's time to end it all.
«Captain» Cocinitas / «Captain» Cookie

"Salud": 2,074,850
- Level: 87
- Skills:
-
Boiler fire: Staying too close to Cocinitas' cauldron deals Fire damage.
-
Throw food: Throw a random chunk of food at the target, dealing Physical damage.

Shortly after finishing Rip Snarl, Captain Kitchens will appear. It would be good to rest right at the end of the previous fight to be able to start this one. The Captain will arrive and get into a Cauldron and soon the combat will begin.
Cocinitas will throw two types of food at the players. The rotten and the good. You will know how to differentiate them because the one that is rotten has a green "cloud" that rolls it. Eating bad food leaves us a negative effect that reduces our attack and movement speed by 30% while eating good food, gives us a benefit which increases attack and movement speed by 30%.
There are two possible strategies for conducting combat. The first is to eat one good meal and one bad meal, or 5 good and 5 bad. The idea is to remove food from the ground to prevent it from filling up, keeping our player balanced.
The other strategy is to eat as much good food as possible since the speed accumulates almost infinitely (up to 99) and attack Cocinitas faster and faster, before the ground is filled with bad food.
It should be noted that Paladins they can eat bad food unaffected while doing so with the bubble on.
Vanessa VanCleef

"Salud": 1,659,880
- Level: 87
- Skills:
-
Backstab: Walk through the shadows and slash the enemy's back, dealing Physical damage over 10 seconds.
-
Deadly blades: Vanessa quickly jumps from target to target, inflicting powerful wounds.
-
Detour: When activated, increases the chance to parry by 100%, reduces the chance that ranged attacks will hit you by 100%, and grants a 100% chance to deflect spells. Lasts 10 seconds.
-
Vengeance by VanCleef: Increases Vanessa's attack speed by 4% and physical damage done by 4% until canceled. Stacks up to 40 times.

The encounter against Vanessa Van Cleef is unique in World of Warcraft. It is quite a challenging encounter and totally optional. Once Cocinitas dies, he will leave a note. If we read it, the fight against Vanessa will begin. In case of failing the combat, we will start over in Phase 1 if we fail in the phase in which we failed.
As soon as it appears, it will infect us with a nightmare toxin.
Phase 1 - Glubtok
Our group will appear at the forge. We will have to open 4 steam valves (they glow) to be able to escape from the room before we get burned. There will be fire on the ground and rocks falling from the ceiling. Avoid fire (as always) as it does a lot of damage and stuns.
Upon leaving the Forge, Vanessa will introduce us back to the nightmare with Glubtok. This is at the end of the room and we will not be able to go through the fire that prevents us from passing since we will die so it is necessary to jump from the side to be able to pass. We will continue dodging the fire until we reach Glubtok, which is a fairly simple combat although we will have to avoid the fire and ice that will appear.
Phase 2 - Helix
Right after Glubtok dies, Vanessa will appear and induce us into the nightmare again by facing Helix. We will see that the entire room is covered in shadows and there are a lot of spiders. It is best to stay where Helix appears to attract the attention of as few spiders as possible. If these come, the tank must take care of them preventing them from damaging the group. The boss must die before the spiders end up overwhelming us too much.
Stage 3 - Siegaenemigos 5000
The next nightmare will test our skills and reflexes. We will have to advance through a tunnel in which we will see some barriers of "lightning" that move in circles (similar to Super Mario: P) if we touch one of the rays we will die. There are some places in the room between the lightning strings where it is possible to stand to resurrect someone. Once we reach the Siegaenemigos, it is quite easy to defeat it.
Stage 4 - Rip Growl
In Snarl's nightmare, we will relive the time when he was human and killed those he loved. We have to save their family members from the Worgen who are attacking them. If any of them die, the encounter will fail.
The first to be saved is Emme Harrington at the end of the harbor. The tank must be made with the worgen that attack it. Once achieved, it will give us a speed benefit that will allow us to advance quickly to save Erik Harrington who is also being attacked by 3 Worgen. After saving him, we will get on the ship and go up to the top and we will meet James Harrington who tries to throw his wife Calissa overboard. We'll have to finish him off before he gets it. Once dead, we will continue climbing to begin the next phase.
Stage 5 - Vanessa VanCleef
Here the real combat begins and is the last phase.
During the phase, Vanessa will make appear numerous enemies that the tank will have to grab. The key to combat is to kill them as well as Vanessa without letting them overtake us. From time to time he will use his skills, typical of a Rogue against the players while we continue with it.
At 50%, Vanessa will put explosive charges all over the ship and they will kill us if we stay. Swift and fast we will go to the opposite side to which we have entered to grab some loose ends and jump while the ship explodes. It seems that Druids instead of shape they have trouble grasping the strings so it is advisable to remove the shape before grabbing the rope. When we return, the ship will be covered by fire that we will have to avoid as they do a lot of damage. Upon returning to the ship, Vanessa will begin to cast Vengeance by VanCleef and we will have to hurry if we do not want to be overwhelmed by the damage.
The same will happen at 25% and there will be more fire although the enemies invoked by Vanessa will stop appearing but the will be activated until we finish with her. It is time to use everything we have to end it.
[notice] In this dungeon there are achievements that can help you get a Volcanic Stone Drake. If you need a little help to make the achievements, do not hesitate to visit our Cataclysm Hero Guide. [/ notice]