Long ago Zul'Jin, Warlord of the Amani Tribe was defeated by groups of adventurers but a new force has taken control of the Amani fortress, The Zandalar Tribe.

Vol'jin, leader of the Blackspear tribe, is recruiting an opposing force to repel the massive resurgence of this warrior faction of the Trolls seeking revenge on Humans and Elves for what they did to them in the past. Zul'Jin will accept any help, be it from the Horde or the Alliance.
A Little History
You may be interested to know how Zul'Aman returns, what is the background now that Zul'jin has been defeated? In a brief way, we will try to explain it.
Many centuries ago, the High Elves and Humans teamed up to defeat the empire of Zul'Aman and nearly extinguished the trolls. Now, the small area to the northeast of Lordaeron is all that remains of everything that once occupied the empire of the trolls. For years, the trolls gave up their claims of expansion and, although they protected their small territory with extreme latticework, they have not advanced another inch since then. During their isolation, they dedicated themselves to worshiping ancestral deities of which little data is available.
Although the Empire was destroyed in ancient times, they have always controlled their forest, known as Zul'Aman but secretly, they have always longed for much more and do not forget what humans and elves did to them. With Lordaeron and Quel'Thalas in ruins and a world in constant turmoil, King Rastakhan, king of all trolls, has summoned all the troll tribes to unite all the trolls under the banner of the Zandalari and rise from their ashes. to claim their old territory.
The Alliance and the Horde are in danger and will have to fight them in both Zul'Aman and Zul'Gurub. Vol'jin, who was also summoned by the King, acts as an infiltrator and infiltrates his forces among the Zandalari to facilitate the raid.
With the help of the Zandalari, the depleted Amani forces have been reunited under a new and fierce leader: Daakara.
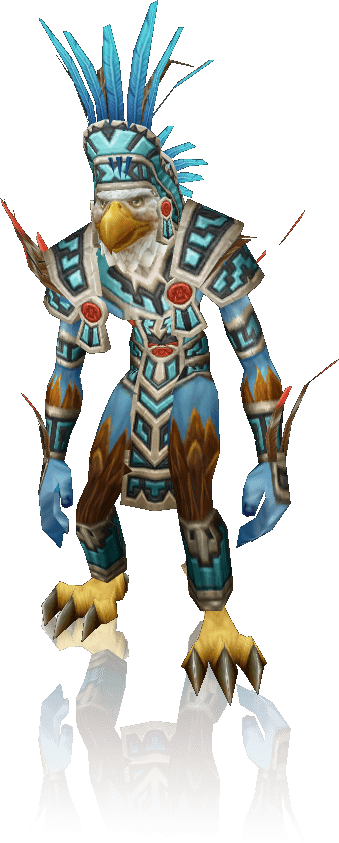
Akil'zon
- "Salud":
- Level: 87
- Skills:

Call lightning: Deals between 28,500 and 31,500 Nature damage.
-
Static disruption: Deals 35,000 Nature damage to enemies in an area and increases Nature damage taken by 25% for 20 seconds.
-
Electric storm: A thunderstorm surrounds the player, damaging the target's allies outside the eye of the storm. Damage increases over time.
-
Grabbed: Grabbed by an eagle you are slowly strangled in time. Deals 4% damage every second until the eagle or player dies.
Akil'zon is quite a fun fight and it bears quite a few similarities to the last match of the Vortex Pinnacle. Nature damage protections can help. It should be noted that if the players do not enter the platform before the start of the fight, they will be left without being able to participate in it.
Players must be separated to prevent Static disruption Wreak havoc on the party as it not only deals damage but increases the electrical damage taken to all players near the hit player.
During the entire encounter, an eagle will appear that will grab a player and transport him across the platform, dealing damage. All DPS should focus on ending her so the DPS / Heal can get back into combat as soon as possible. It should be noted that the player can continue to do damage and heal and it is highly recommended that he do so, especially in the case of the healer. In addition, eagles will go down to annoy players with low health a bit and will fall with the players' area skills.
Eventually, a player will rise creating a Electric storm around it. Players must stand under the player to avoid taking a large amount of electrical damage.
The combat shouldn't be too much of a problem and is probably the easiest in the dungeon.
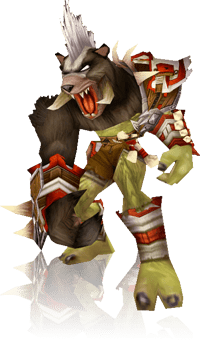
nalorakk
- "Salud":
- Level: 87
- Skills:
- Troll phase
-
Brutal blow: A brutal attack that ignores the armor. Deals between 78,000 and 82,000 points of physical damage.
-
Wave: Charges the farthest enemy, dealing 34,125 to 35,875 points of physical damage. Also increases Physical damage taken by 500% for 20 seconds.
- Bear Phase
-
Lacerating slash: Deals 179,400 points of Physical damage over 24 seconds.
-
Deafening roar: Silence all players in a huge radius
- Troll phase
Nalorakk is a fairly straightforward combat. The tank should be placed in the center of the platform while ranged DPS and healers stay away. The furthest player will be targeted by Wave dealing a lot of damage and leaving an annoying effect that greatly increases the damage received to the point that if it is hit again with this effect, the player will die. To avoid deaths, players will have to rotate in a way that does not always hit the same player. That is, once a player is hit, they will stay close to the tank to avoid being hit again.
At around 60% health, Nalorakk will transform into Bear and stop charging at players. We will only have to be aware of when you are going to use your Deafening roar as it will interrupt all spells, preventing spells from being cast. This is especially annoying to healers if it matches the Lacerating slash.
At 30% it will alternate its forms at least a couple of times and we will only have to be aware.
Jan'alai
- "Salud": 5,394,000
- Level: 87
- Skills:
-
Flame breath: Deal 15,000 fire damage to enemies in a cone in front of Jan'alai.
-
Fire bomb: Jan'alai throws many fire bombs on the altar. A few seconds later, they will detonate, dealing between 73,125 and 76,875 points of fire damage to anyone left on them.
-
Summon Breeder Amani'shi: Summons two Amani'shi breeders who will begin to open the eggs on the sides of the altar.
- Amani'shi Dragonhawk Hatchling
-
Flame shake: Deals between 23,125 and 26,875 points of damage to an enemy and increases their fire damage taken by 5% for 8 seconds. Stacks up to 50 times.
This combat is practically identical to the original. There are eggs on either side of the platform that the breeders will try to exploit. If we kill both breeders, all the eggs will explode when Jan'alai reaches 35% health which adds unnecessary difficulty. Therefore, whenever the breeders appear, we will kill one and let the other do its job, killing the Dragonhawks that appear with areas. If you find yourself very overwhelmed, you can use Frost Traps to slow them down and finish them off without reaching the group.
Meanwhile, Jan'alai will often use her Flame breath leaving a good furrow of flames on the ground from which, obviously, it will be necessary to move away. Every so often, it will make appear Fire bombs all over the platform. They are very visible and, after a while, they will explode doing a lot of damage. As long as you do not stay in the yellow areas of the bombs, you will be safe from damage.

Hallazzi
- "Salud":
- Level: 87
- Skills:
- Troll phase
-
Frenzy: Increases Halazzi's attack speed by 60%.
-
Water totem: Summons a water totem lasting one minute that restores 5% of mana and health to nearby units every 2 seconds.
- Lynx phase
-
Shred armor: Shreds an enemy's armor, reducing it by 10% for 8 seconds.
-
Lynx barrage: Summons a water totem lasting one minute that restores 5% of mana and health to nearby units every 2 seconds.
-
Corrupted Lightning Totem: Deals between 9,500 and 10,500 Nature damage to the target.
- Troll phase
The fight against Halazzi consists of two phases.
In the first, we will see his avatar form (the one in the image). During this phase, Halazzi will summon a Water totem that will heal you. We can kill him or move away from the totem's healing area.
At 66% and 33%, Halazzi will separate from the lynx spirit and we will see the troll in him as well as the Lynx. The Lynx no Threat table so it will attack players randomly. The entire DPS will have to focus on the Lynx at this stage so that he is forced back into Halazzi's body. We will have to pay attention to Corrupted Lightning Totem as it launches a bolt of lightning that jumps between targets. It's a fairly intense phase to heal due to the Lynx's uncontrolled damage, although it can be mitigated with area heals as long as the party stays together.

Hex Lord Malacrass
- "Salud":
- Level: 87
- Skills:
-
Drain power: Drains the energy of all nearby enemies, reducing their damage dealt by 1% and increasing their damage dealt by Malacrass by 1%.
-
Spirit Downloads: Launches missiles of dark magic at nearby enemies, dealing Shadow damage.
-
Suck soul: Extract the target's soul and deliver it to Malacrass, granting you its powers for 30 sec.
Malacrass is accompanied by two more enemies. One of them must be controlled while you finish with the other to avoid problems. The tank must keep them controlled so that they do not attack the rest of the players. Once one falls, you must get rid of the other.
Once they die, you must focus on Malacrass. His Spirit Downloads is very annoying for the healer as it deals a lot of shadow damage to all players. In addition, the troll uses an ability called Drain Power that increases its damage by 1% and reduces ours by 1%, making combat more difficult as it progresses. However, these are not Malacrass's most important abilities.
Its main power is that of Suck soul that allows him to use skills from other classes, posing new challenges each time you face him. The best strategy is to interrupt all possible attacks and / or dispel their effects, especially healing ones. Take special care since, if you have a Death Knight, he can activate Blood mark And, if you attack him, he will heal a lot for each hit he receives.

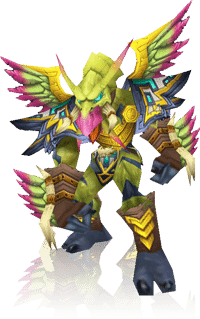
daakara
- "Salud": 6,639,000
- Level: 87
- Skills:
-
Whirlwind: Attack nearby enemies with a whirlwind of steel that deals 110% of normal damage.
-
Painful release: A bloodthirsty attack that causes the target to bleed profusely until fully healed. Deals 7,500 points of damage every 5 seconds until healed.
-
Eagle shape: Daakara is imbued with the spirit of the Eagle.
-
Energy stormCreates a fearsome energy storm that reacts to enemy players, blasting electricity at them when they cast spells, dealing 12,000 Nature damage to the caster casting the spell.
-
Lightning totem: Summons a Lightning Totem that periodically damages nearby players. Lasts 30 seconds.
-
Summon Cyclone: Summons cyclones across the platform.
-
Bear shape: Daakara is imbued with the spirit of the Bear.
-
Progressive paralysis: Affects all nearby players with a progressive paralysis that stuns if not removed within 6 seconds.
-
Wave: Charge an enemy, dealing 34,125 to 35,875 points of physical damage. Additionally, the physical damage the target takes is increased by 500% for 20 seconds.
-
Almost overwhelming lunge: Instantly attacks the tank, dealing 115% normal damage. It can be used at any time, even after the target dodges. This attack cannot be blocked, dodged, or parried.
-
Dragonhawk form: Daakara is imbued with the spirit of the Dragonhawk.
-
Pillar of fire: Create columns of fire on the platform.
-
Swirl of flames: You spin by spitting fire at all nearby enemies and increasing their vulnerability to Fire magic.
-
Flame breath: Deals 19,500 to 20,500 points of Fire damage to enemies in a cone in front of the Daakara.
-
Lynx shape: Daakara is imbued with the spirit of the Lynx.
Daakara is a combat very similar to that of Zul'Jin.
He starts the fight with his troll form and, during the fight, he will change form twice to one of the avatars that we have already defeated randomly.
Eagle
Daakara will spawn 5 cyclones that, although immobile, will change their position every few seconds. These shoot rays at nearby players so you will have to avoid getting close to them. As soon as the Lightning totemMake sure you finish him off.
Bear
When Daakara turns into a bear, he will charge randomly castWave on a player just like Nalorak while wearing Almost overwhelming lunge over the Tank. The Healer must be alert to prevent everyone from being paralyzed by the Progressive paralysis.
Lynx
During this phase, two lynx appear and the boss will transform into a lynx in turn. The two smaller bobcats must be eliminated quickly to minimize damage to the tank and players as Lynx race e Paw Wrath. Daakara meanwhile will charge on random players leaving a bleed effect. Very intense to heal.
Dragonhawk
Turned into a Dragonhawk, Daakara will spit his Flame breath on the players, leaving fire on the ground from which we will have to move away. In addition, it will invokePillar of fireby the platform to be dodged. Almost all damage is easily avoidable.
Botín
| Akil'zon | nalorakk | Jan'alai |
|---|---|---|
| Hallazzi | Hex Lord Malacrass | daakara |
ADIEX