
Hey good ones! How's life going for you? We hope well because today we bring you the official guide to GuíasWoW of King Rastakhan, boss of this new raid recently added in patch 8.1.0, the Battle of Dazar'alor. Without further ado, let's get to it!
Battle of Dazar'alor
The Battle of Dazar'alor is the second band that we will see in this expansion, Battle for Azeroth, where we will be able to continue the history of both factions and the battle that will take place in the main city of the Zandalari. Will the Alliance end the Horde once and for all or ... will it be the Horde who manages to defend the great city of gold from which its newest allies come?
The Alliance assaults the heart of the Zandalari Empire in Battle of Dazar'alor, a new raid that offers unique encounters for Horde and Alliance players, as well as the opportunity to participate in events from the opposing faction's point of view.
Since time immemorial, Dazar'alor has stood at the center of the vast and powerful Zandalari empire. Its guards have thwarted numerous attempts to kill King Rastakhan, and the structure has survived hardships both in recent times and in the past. However, as war nears the shores of Zuldazar, the Alliance embarks on a daring ploy to lay siege to the golden pyramid and break the Zandalari's link with the Horde.
King Rastakhan
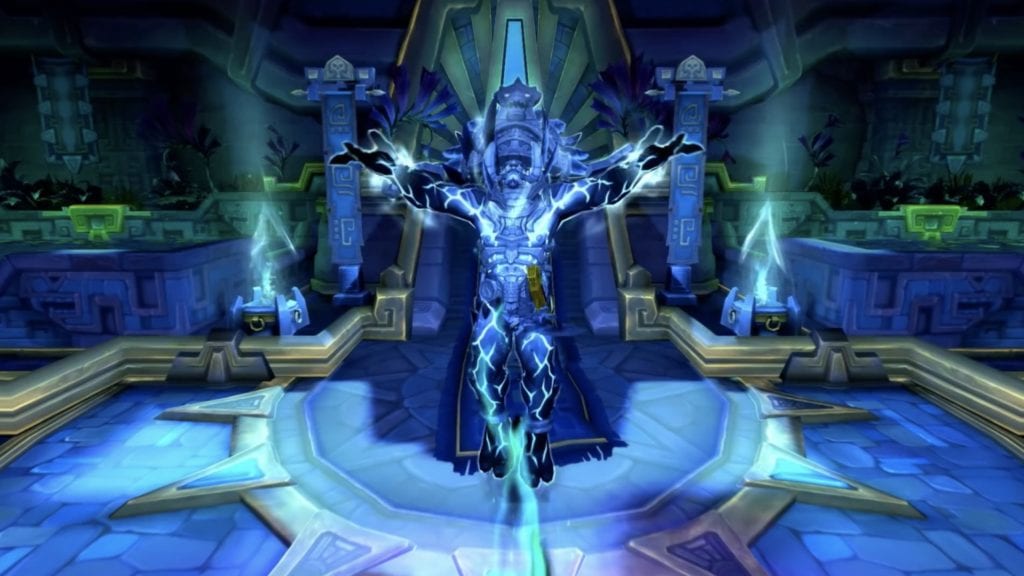
First of all, we must bear in mind that King Rastakhan is "only" available to the Alliance. The horde must speak with a specific NPC that will appear in the band to enter a kind of "Flashback" where we will fight it as part of the Alliance.
King Rastakhan has ruled the Zandalari Empire for over two hundred years. Since Rezan's fall, he has turned to a new patron: Bwonsamdi, the loa of death. The dark pact they have signed gives him the power to crush his enemies, but… at what cost?
On this occasion, we will once again have the collaboration of Yuki y zashi. Here is the complete guide to King Rastakhan:
Without further ado, let's start with the boss's guide.
Summary
King Rastakhan calls on his retinue of bodyguards to defend him and his throne room. After his bodyguards fall, Rastakhan summons his loa, Bwonsamdi, to come to his aid. When Rastakhan reaches 60% health, he asks Bwonsamdi to boost him and Bwonsamdi transfers a part of his death power to him. After the transfer, Bwonsamdi passes into the realm of death and drags half the group with him.
When Bwonsamdi's health is reduced to 50%, leave Rastakhan and teleport all players in the realm of death to the world of the living to end the battle against Rastakhan.
Skills
Phase 1: Zandalari Honor Guard
- Scorching detonation
- Link souls
- Plague of toads > Poisonous toad slime (Heroic and Mythical)
- Greater Serpent Totem (Heroic and Mythical)> Snake breath
Phase 2: Bwonsamdi Pact
- Scorching detonation
- Fire plague
- Zombie Dust Totem
- Plague of toads > Poisonous toad slime (Heroic and Mythical)
- bwonsamdi
Phase 3: Enter the realm of death
- Scorching detonation
- Bwonsamdi's Favor
- Zombie Dust Totem
- Death Gate > Death fault > Withering Burst
- bwonsamdi
- Ghost of anger
- Ghost of Retribution
Phase 4: Uncontrollable Power
- Death caress
- Plague of toads > Poisonous toad slime (Heroic and Mythical)
- Fire plague
- Death Gate > Death fault > Withering Burst
- Inevitable end
- The all-encompassing death
- Bwonsamdi's Favor
Tips
-Tanks
- Put Death fault in locations that protect allies in the realm from the death of Terrifying mowing.
- Stay away from King Rastakhan when you are the target of Scorching detonation.
- Stay away from Bwonsamdi or King Rastakhan when you are the target of Death caress.
-Healers
- Put Death fault in locations that protect allies in the realm from the death of Terrifying mowing.
- Clears lethal crushing in a coordinated way Death fault.
- Avoid healing allies under the effect of Death caress.
- Focus your healing on players affected by Painful Ax and Focused Bane.
-DPS
- Put Death fault in locations that protect allies in the realm from the death of Terrifying mowing.
- Clears lethal crushing in a coordinated way Death fault.
- Avoid killing your ally by attacking the Voodoo Doll.
Strategy
Normal
Although the combat takes place in 4 phases and seems quite long, do not worry. Later we will see how the same skills are repeated one after another so there will be no greater difficulty:
Phase 1: Zandalari Honor Guard
During this first phase, King Rastakhan will have the benefit Link souls which will allow him to redirect all the damage received to all his guards, so we can do damage in area and inflict extra damage.
Rastakhan must be tanked with his back to the raid and will use Scorching detonation on the tank every so often, channeling the ability for 5 seconds and exploding upon completion. Damage from the explosion occurs from the position of the tank affected by the ability and will deal damage to the entire raid, decreasing according to the distance the tank is at that moment.
We can also appreciate the faculty Plague of toads It will activate every few seconds, summoning a cone of frogs that will walk horizontally towards the edges of the room. Coming in contact with them will damage the area and add lethal damage to the affected player, so we must avoid it at all costs.
On the other hand, we will see the two bodyguards that will appear in this first phase:
- [focus]Siege Breaker Roka will mark and use Meteor jump on a random player, dealing a huge amount of damage that will be distributed among players who are near the affected caster. Upon impact, it will use Crushing jump on the closest player, applying Crushed, so the tanks will have to be changed to the mob after each mark.
- Prelate Za'lan will use Seal of Purification on a random player, causing them to be chased by a beam of light that will damage all players who come in contact with it.
Phase 2: Bwonsamdi Pact
After the start of Phase 2, players will be frozen and a series of short dialogues will begin. After this, Bwonsamdi will appear in combat and will be the main target.
Rastakhan will continue to use his basic abilities that we saw in the first phase only that it will take a little longer to cast them in this phase. This will get a new faculty, Fire plague, applying a debuff to random players and marking them with a red area that, after the explosion of its expiration, will damage and apply Fire plague to all the players who were inside at that moment. Finally we will see Zombie Dust Totem, controlling two players who will begin to launch abilities and that we will be able to return to normality by breaking said totem. Nothing difficult at the moment.
Bwonsamdi, on the other hand, will launch other types of faculties. First of all, this will have the benefit Lifeless, so we will not be able to inflict harm on it. In addition, this will also have Death Aura, applying Lethal wilting to any player who is not within 30 meters of him. Let's look at their basic skills:
- Death caress: he will launch it on the tank every so often, so he will have to throw CDs or other types of survivals to stay alive.
- Death Gate will cast it on a random player, dealing a fair amount of damage. When it expires, it is created Death fault, so players must use it to continue to the third phase (or at least to survive in it).
When Rastakhan reaches 60% of his maximum health, the third phase will be activated and he will cast Bwonsamdi's Favor.
Phase 3: Enter the realm of death
When the third phase begins, Bwonsamdi will draw half of the raid players closest to him to the world of the dead, while the rest will remain in the world of the living. Obviously, there is no contact between the two worlds so we will be in two different places. In this way, half of the band will fight Rastakhan and the other half, against Bwomsandi.
-Dead's world
In this world, we will fight directly against Bwomsamdi. This will obtain the following powers:
- Death Aura apply to Lethal wilting to all players within the realm of death. Distance doesn't matter anymore. These marks will accumulate and can be cleaned thanks to the Death fault that we left in the previous phase. When we clean our brands, we will activate Withering Burst, which will deal raid damage within the world of the living.
- Death caress will cast it on a random player, it no longer needs to be the tank. This time the negative healing will last less.
- Terrifying mowing They are areas of black smoke that will appear in the room and go from one side of the combat zone to the other, doing a lot of damage to the players who come in contact with them.
- Inevitable end He will launch it every minute, creating a damaging purple area around him that will draw all players inside.
-World of the living
In this world, we will fight Rastakhan directly. This will obtain the following powers:
- Scorching detonation will continue to use it, there are no changes in this faculty.
- Zombie Dust Totem will continue to use it, there are no changes in this faculty.
- Next to this, a Ghost of Retribution or with a Ghost of anger, ghosts that will have to be tanked. Within a minute after their appearance, they will obtain Immortal ruthlessness. Also, upon death, they activate Empowered spirit leaving a Death fault instead.
Ghosts will use the following abilities:
- Burial discharge You will use it on the tank and it should be interrupted if possible.
- Bwonsamdi stamp several zones will be activated at random points in the combat zone in which the players must enter and wait for them to expire or they will activate the Bwonsamdi's Olera for each area that has not been socked.
- Necrotic Smash will launch it on the tank, dealing area damage and reducing healing to nearby players.
This phase ends when Bwomsandi reaches 50% of his maximum health.
Phase 4: Uncontrollable Power
After reaching 50% of their maximum health, players will rejoin in the world of the living and where we will face King Rastakhan directly to end him once and for all.
During this phase, Rastakhan will recover and use the following abilities:
- Plague of toads, Scorching detonation y Fire plague will retrieve them unchanged.
- Bwomsamdi will empower it with Death Gate y Inevitable end.
- All the Terrifying harvests will cross the Death fault that we have left in the previous phases, so it will be important to place them correctly.
- The all-encompassing death will launch it from time to time and leave behind a Death fault.
Heroic
The changes for this modality are the following:
- In the first phase, together with his two bodyguards, he joins Gal'wana Headhunter. This will use Painful Ax Barrage, throwing Painful ax to random players.
- Plague of toads will leave in their wake Poisonous toad slime. These slow down and do quite a bit of damage.
- Fire plague it is channeled much faster.
- Rastakhan wins Greater Serpent TotemUsing Snake breath and damaging the players hit.
- In phase 3, a new ghost is added. Ghost of the carnage will channel Burial discharge (interruptible) on the tank. In addition, it will launch Focused doom on a random player who can only be interrupted by the affected caster.
Botín
You can visit the following link to know the loot of all bosses:
Battle of Dazar'alor - Loot, bosses, achievements
Here are the guides for all the Dazar'alor gang bosses:
-Alliance
- Ra'wani Champion Normal and Heroic - Dazar'alor
- Jadefire Masters Normal and Heroic - Dazar'alor
- Grong the Risen Normal and Heroic - Dazar'alor
- Normal and Heroic Opulence - Dazar'alor
- Conclave of the Chosen Normal and Heroic - Dazar'alor
- King Rastakhan Normal and Heroic - Dazar'alor <-
-Horde
- Champion Frida Normal and Heroic - Dazar'alor
- Grong King of the Jungle Normal and Heroic - Dazar'alor
- Jadefire Masters Normal and Heroic - Dazar'alor
- Greater Handyman Mekkatorque Normal and Heroic - Dazar'alor
- Storm Block Normal and Heroic - Dazar'alor
- Lady Jaina Valiant Normal and Heroic - Dazar'alor
And so far this guide from King Rastakhan. We hope it has served you and, above all, we thank you once again Yuki y zashi for collaboration.
You can access his YouTube channel to see the rest of the guides from the following link:
Greetings from GuíasWoW and a big hug (>^.^)> hug <(^.^<)!