
Hey good! How are you doing with the new expansion? Today we want to bring you this guide on one of the new dungeons in Battle for Azeroth, Temple of Sethraliss, in collaboration with our colleagues Yuki and Zashy. Let's get to the point!
Sethraliss Temple
The Temple of Sethraliss is one of the new dungeons that has been introduced along with the new expansion of World of Warcraft Battle for Azeroth, a dungeon that is located in Vol'Dun.
Centuries ago, Sethraliss, a powerful serpent loa, sacrificed herself to prevent Mythrax from releasing her master on Azeroth. After the battle, her devoted followers moved her remains and built a temple around her, hoping that she would be reborn. Now, within the temple, a dark force is stirring that seeks to use its power for evil purposes.
This dungeon has 4 different bosses and, unlike other dungeons, this one does not grant mount on Mythic difficulty. Instead, you can get Spawn of Merektha as a reward for an egg that hatches after three days.
Before starting with the complete guide on this dungeon, we want to inform you that this guide is possible thanks to the collaboration with Yuki y zashi.
Here is the complete guide to the Temple of Sethraliss:
Without further ado, let's get started with the bosses guide.
Adderis and Aspix
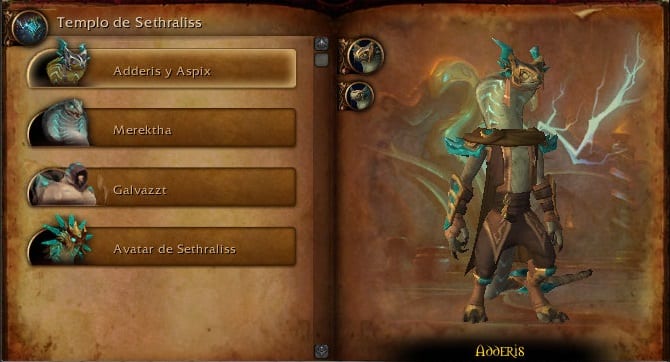
adderis and Asperix ... I say Aspic It will be the first duo that we will face in this dungeon. The pulls that are found before reaching these will not give much trouble. I recommend cleaning the entire room before starting the boss since there can be misunderstandings and end up fighting more mobs than we should.
A pair of sethrak with the mission of guarding the entrance to the temple to prevent anyone from interfering in their master's plans.
Summary
Aspic y adderis they have a Lightning Shield that continuously transfers between them during an encounter. This shield empowers the receiver and grants him access to powerful lightning abilities. When they are not empowered in this way, they will use wind attacks.
Skills
-Aspix
- Shake
- Blew it
- Driving
- Static shock
- Gale force
-Adderis
Tips
-Tank
- Lightning Shield reflects damage to attackers.
- Step aside to avoid the Cyclone strike by Adderis.
- Disperse when Adderis reaches 100 energy to avoid damage from Bow rush.
- Keep Adderis close to your allies when he's out of shield to help split the damage of Arched blade.
-DPS
- Lightning Shield reflects damage to attackers.
- Step aside to avoid the Cyclone strike by Adderis.
- Avoid harming your allies when it affects you Driving.
- Scatter for Bow rush.
- Stay close to Adderis when he's out of a shield to help split the damage from Arched blade.
- Healer
- Stay away from your allies when you are targeted by Driving.
- When he has 100 energy points, Aspix will cast Static shock, which will deal a lot of damage to the party.
- Disperse when Adderis reaches 100 energy to avoid damage from Bow rush.
- Stay close to Adderis when he's out of a shield to help split the damage from Arched blade.
Strategy
The mechanics for this boss is very simple since we only have to dodge the areas and attack the target that is not powered by the shield. Let's explain the mechanics.
Our main objective will be to defeat adderis as Aspic will be the first to get Lightning Shield. This ability will reflect the damage we inflict on it, so we must change the objective whenever one of the two is empowered.
The goal powered by Lightning Shield He will do different abilities at 50% and 100% energy and they will change the shield when one of them reaches 100%.
- adderis at 50% energy, it will use A peal of thunder creating an area around him that we must move away from since, at the end of his channeling, he will inflict a large amount of damage to the players who are near him. At 100% energy, he will use the ability Bow rush, hitting all players and dealing a large amount of damage that will need to be healed.
- Aspic when reaching 50% energy it will use Driving, applying a debuff to the target and damaging everyone in the area taking a large amount of damage. The affected will simply have to get away from their allies. Upon reaching 100%, you will use Static shock, an ability where nothing can be done to prevent taking full damage. It is the healer's job to cap the lives and the rest's job to use CDs if they don't have enough life to endure it.
For this boss it will be necessary to be clear about some abilities due to the amount of damage they inflict. adderis will employ the faculty Arched blade, creating an arc of light around her that will expand throughout the room and inflicting damage to all allies (and dividing it) against whom it comes into contact. This ability is not enough to jump to dodge it since it cannot be dodged, it will be enough to get as close as possible to the boss to receive the least possible damage. Another of the faculties that we will see will be Cyclone strike, invoking cyclones that will head in the form of a frontal cone to where you are looking, inflicting a great amount of damage if we get to touch them. To avoid them, we must look at the position of the boss and it should be enough to move a little.
Aspic will use Shake and Puff, both interruptible abilities. All these two abilities do is hit the target and deal a large amount of damage.
meretha

meretha He is the second boss of this dungeon. Before reaching it, you have to be careful with the mobs since they use an interruptible ability that will heal them for a high percentage of health. Upon reaching a low percentage of life, they will try to drain the eggs that are around them, boosting them and dealing more damage. For him to appear, you will have to eliminate all the objectives of the stage.
Merektha is the product of vile experiments to create an unstoppable army of beasts. As her eggs are about to hatch, this mother is looking for victims to feed her hungry offspring.
Summary
meretha will emerge and attack players while small groups of eggs of meretha they will start to open up. Once out of the shell, the snakes will attack the players while meretha Dig and load around the play area. meretha it will re-emerge shortly thereafter and a new clutch of eggs will begin to hatch. meretha it will repeat the Dig and Resurface process one more time.
Skills
Other targets during combat
Tips
- Turn your back on the Blinding sand Merektha to avoid blind you.
-Tank
- Defeat the Poisonous ophidians to avoid the great damage of Cytotoxin.
- Bring the sandwiched besiegers out of their Dust clouds so your DPS can kill them.
- A stun ability will release the victim wrapped in a Snake knot immediately.
-DPS
- Sandblast Siegers cannot be hit while they are Darkened.
- Defeat the Poisonous ophidians to avoid the great damage of Cytotoxin.
- Quickly unleash allies engulfed by a Snake knot. A stun faculty immediately frees the victim.
- Healer
- La Cytotoxin it is a poison that can be eliminated.
- Players wrapped by Snake knot they will take damage until they are freed. A stun faculty immediately frees the victim.
Strategy
When we start the encounter, we will have a good time to bursar the boss without starting his excavation phase. However, we will have to be careful with the faculty Snake knot as this will stun a random player and take a large amount of damage over time if it is not eliminated. This ability can be safely removed by using some stun ability on Snake knot.
While the boss is on the sand, she will not stop expelling Toxic puddles everywhere and randomly. They will simply harm us if we stay on top of them.
Once the phase of Dig, four will appear Poisonous ophidians that must be eliminated quickly as they poison the target adding a cumulative debuff that deals a large amount of damage. This debuff can be removed. As long as Merektha is underground with the faculty Dig active, players who try to get in front of it will be knocked back and take a small amount of damage. From time to time, you are Poisonous ophidians they will place a Dust cloud at their feet (they have told me they have a closet full of shoes and boots) which will prevent them from being targeted. The tank will need to move them out of those dust areas to allow SPDs to kill them.
Once we have defeated them at four o'clock, the boss will return to the arena, bringing with her a new ability that she will use from time to time. Blinding sand it is the faculty in question, and it will mislead us if we continue to look at it when its channeling ends. Simply, to avoid this ability, we will have to turn our character around and there should be no problem.
Galvazzt
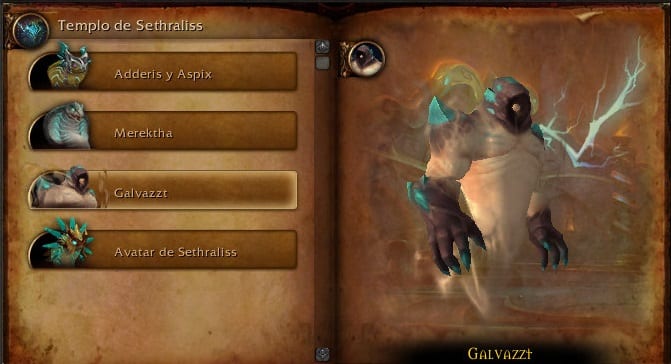
Galvazzt He will be the third boss of this dungeon, with a curious mechanic that will lead us to death if we do not do it correctly. Before reaching this boss, we must be careful with certain bosses that channel Accumulate Charge and then detonate it, dealing a large amount of damage. This power is interruptible. In order for the boss to be summoned, we will have to defeat all the elementals in this small room.
After his temple was corrupted, Sethraliss's control over the lightning created altered elementals that roam the submerged chambers. The most powerful of them is called Galvazzt, and he is capable of taking down anything that comes his way.
Summary
Cores of energy form throughout the play area trying to empower Galvazzt. Players can step in to empower themselves instead, but will take more damage the longer they do so.
Skills
Other targets during combat
Tips
- Get between Galvazzt and any of the energy cores there to prevent Galvazzt stay Galvanized.
- Players take more damage from Galvanize the longer they stay in the beam.
- Galvazzt launches Consume load if it reaches 100 energy points.
- Condensation Increases all damage done by Galvazzt.
Strategy
Although this boss is not difficult at all and its mechanics are quite simple, the damage it inflicts with respect to its abilities is quite high.
In this meeting we will simply have to position ourselves in front of the pillars that will be generated around the stage and position ourselves in such a way that the electrical beams hit us.
These hazes will inflict more damage on us compared to the time in which we find ourselves blocking the beam itself due to a cumulative debuff that will reset over time. I advise catching hazes only when our marks have been reset and being vigilant when we must move to help our allies and prevent such charges from accumulating further.
In the event that the boss ends up obtaining 100% of his maximum energy, he will charge and use the ability Consume load, dealing a massive amount of damage to all players. By resetting its power percentage, it will get a charge of Condensation increasing the damage dealt by the boss by 20%.
Sethraliss Avatar
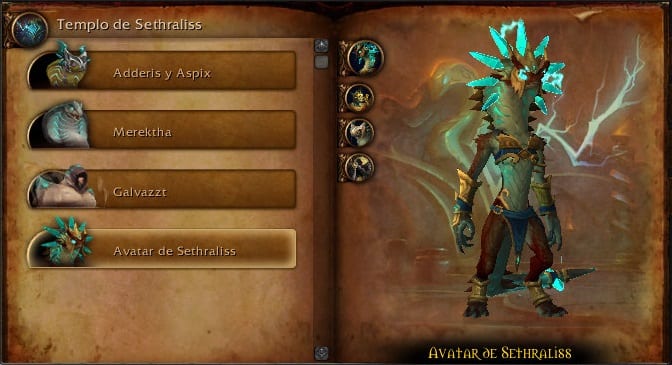
And as part of the last encounter of this dungeon, we will have to help the Avatar of Sethraliss to eliminate the corruption of those chambers. To do this, we will have to destroy her enemies and heal her completely to end the encounter. Before reaching this boss, we will find a door in the shape of a skull that we will have to open with two snake eyes. When we collect them, we will see our movement speed reduced by 70% and nearby enemies will try to take their eyes off us to prevent us from reaching the last encounter.
Sethraliss's heart is in the hands of a terrible power that seeks to corrupt her. His avatar must be restored before this evil takes hold and is reborn as a dark loa capable of destroying all of Vol'dun.
Summary
Jakra'zet's allies will continuously cast Corruption against Sethraliss's avatar, thwarting attempts to heal her. More and more allies of Jakra'zet will appear as the avatar's health is restored, often causing the Frogs to apply Plague to you. Dispatch Heart Guardians and Hoodoo Healers to make the most of the opportunity to restore the avatar's health. The encounter is complete when the avatar's full health has been restored.
Skills
Other targets during combat
- Hoodoo Hexer -> Corruption
- Guardian of heart -> Heart attack
- Rain of frogs -> Plague frog -> Over
- Plague doctor -> Chain of lightning / Snake amulet (Heart shock)
Tips
- The Guardians of heart They will deal much more damage to you the longer they stay alive.
- All the Plague frogs they hunt down the healers and apply Over.
- The fragment of energy that generates a Guardian of heart is most useful when the Avatar of Sethraliss is not under the effect of Corruption.
-Tank
- It displaces the Guardians of heart towards any Hoodoo Hexer so DPS can take advantage of its ability to deal damage.
-DPS
- The Hoodoo Healers reduce the amount of healing the Avatar of Sethraliss receives. Eliminate them!
- Healer
- You must heal the Avatar of Sethraliss completely for your party to succeed.
- Over will thwart attempts to heal the avatar.
Strategy
Before starting the meeting, we will meet four Hoodoo Hexer that we will have to eliminate to start the final boss.
Once we talk to her, four more will instantly appear. Hoodoo Healers channeling Corruption. These must be eliminated as they are the ones that prevent the healer from doing his part of the work.
The tank should catch the Guardian of heart y Plague doctor and, if possible, move them to where one of the Hoodoo Healers to take full advantage of the damage. The Guardian of heart will apply Heart attack cumulatively, dealing an incredible amount of damage to the tank if not removed quickly. Once we have defeated the Guardian of heart, this will leave a Energy Shard on the ground, a fragment that we will have to use when all Hoodoo Healers who are in combat have died since, as the damage they add to the avatar says, Corruption reduces the healing it receives.
We will also have to be careful with Plague frog since they will appear constantly and explode when they reach us, adding the damage Over to nearby players. It doesn't matter which tank or DPS eat these frogs as they can simply be dispelled. However, the healer must be prevented from eating the frogs as the debuff will reduce the healing performed by 50% per stack.
Once the healers have died, we will use the sphere and the healer can begin to heal the avatar (help those of you with healings if possible to finish the encounter with greater speed).
After a few seconds, the same mechanics will be repeated up to three times (if we have not stopped the healings performed on the avatar), the fourth being the final "phase" of the encounter, receiving a buff that will grant us haste and 90% damage taken reduced.
And so far this guide to the Temple of Sethraliss dungeon. We hope it has served you and, above all, we thank you once again Yuki y zashi for collaboration.
You can access his YouTube channel to see the rest of the guides from the following link:
Greetings from GuíasWoW and a big hug (>^.^)> hug <(^.^<)!
Thank you very much for your guides, they always help me.